WIFI on the water can be a challenge, but it does not have to be
🚤 Boat WiFi That Actually Works
How I solved the marina WiFi problem with a proper bridge setup
No more double NAT headaches • Keep control of your gear
🛒 Required Equipment

📡 Uplink Router (Mounted on Dodger):
MikroTik GroveA 52 AC – Outdoor CPE 802.11ac Gigabit PoE 2.4GHz 5GHz 5W OSL4 8dBi US Version
🛒 View on Amazon- Weatherproof outdoor design perfect for marine use
- High-gain 8dBi antenna for long-range reception
- Dual-band AC wireless with excellent sensitivity
- PoE powered – single cable installation
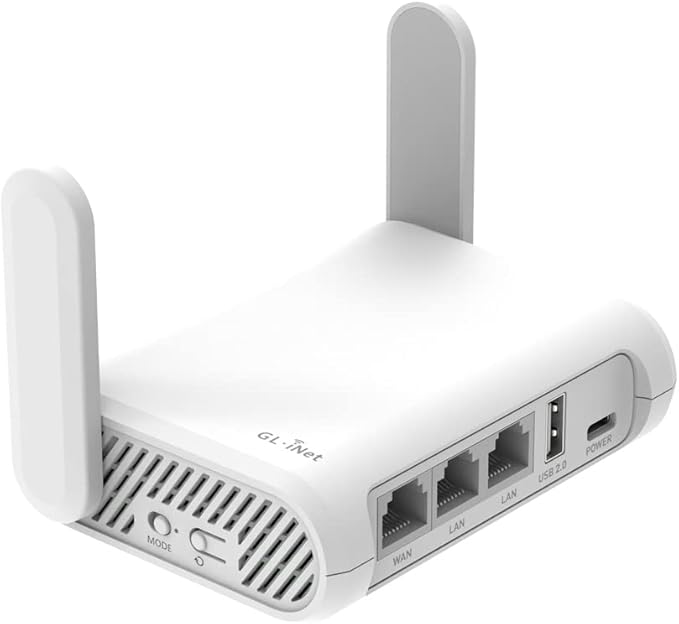
🏠 Cabin Router (Inside Boat):
GL.iNET GL-SFT1200 (Opal) – Secure Travel WiFi Router, AC1200 Dual Band Gigabit Ethernet Wireless Network
🛒 View on Amazon- Compact size perfect for boats
- AC1200 dual-band for fast local network
- Built-in VPN support for security
- Easy web interface and mobile app
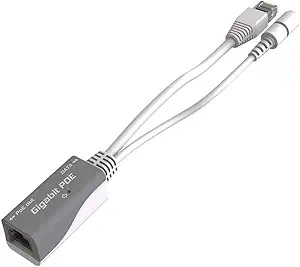
- Powers the GroveA via ethernet cable
- Eliminates need for separate power cable to dodger
- Gigabit passthrough maintains full speed
- Compact design for boat installation
🔌 Connection Diagram
Public WiFi
(Dodger Mount)
Bridge Mode
(Inside Cabin)
Your Private WiFi
Phones, Laptops
🎛️ You Won’t Lose Control
The MikroTik will always be at: http://192.168.1.254
So when the marina changes their WiFi password (and they will), you can update it without pulling your hair out.
Mount Everything First
The physical setup:
- GroveA on the dodger: Mount it somewhere with a clear shot to the marina WiFi – this thing has serious range
- Run one cable: Ethernet from dodger to cabin (the PoE means you only need this one cable)
- PoE injector in cabin: Plug the cable from outside into the “PoE” port, cable to your Opal into “LAN”
- Opal wherever you want WiFi coverage: Usually central in the boat works best
Get Into the MikroTik
Connect to it first:
- Plug your laptop into the GroveA with an ethernet cable
- Or connect to its default WiFi (looks like “MikroTik-XXXXXX”)
Then log in:
- Web browser: Go to
192.168.88.1 - Winbox: Download from mikrotik.com if you want the fancy interface
admin, password is blank (just hit enter)
Tell It the Marina WiFi Password
Easiest way – use the web interface:
- Click Wireless then Security Profiles
- Click on the default one
- Change Mode to
dynamic keys - Set Authentication Types to
WPA2 PSK - Type the marina password in WPA2 Pre-Shared Key
- Hit Apply
Command line version (if you’re feeling fancy):
Set Wireless to Station Mode
Web Interface:
- Go to Wireless → Interfaces
- Double-click wlan1
- Set Mode:
station - Set SSID:
club - Set Security Profile:
default - Uncheck Disabled
- Click Apply
Terminal Commands:
Clean Up Existing Configuration
Remove unnecessary configurations while preparing for bridge mode:
Create Bridge with Management Access
Create the bridge and add a management IP so you can always access the MikroTik:
Connect GL.iNET Router
- Connect ethernet cable from GroveA to GL.iNET WAN port
- Power on GL.iNET Opal router
- Configure GL.iNET to use 192.168.1.x subnet (e.g., 192.168.1.1)
- GL.iNET should get internet access through the bridge
- Set up your private WiFi name/password on GL.iNET using the web interface or mobile app
Verification Steps
- Test MikroTik Access: Browse to
http://192.168.1.254 - Check GL.iNET Opal Status: Should show connection to club network via the admin panel
- Connect device to your private WiFi
- Test internet: Browse websites, check speeds
- Verify no double NAT: Use online NAT detection tools
When the Marina Changes Their Password
This will happen, so here’s how to fix it:
- Connect to your Opal’s WiFi network
- Open a browser and go to
http://192.168.1.254 - Log into the GroveA (still username: admin)
- Go to Wireless then Security Profiles
- Edit the default profile
- Update the password
- Hit Apply and you’re back online
When Things Go Wrong
Can’t connect to the marina WiFi?
- Double-check you typed their password right
- Some marinas block devices like this – ask the dockmaster
- Try moving the GroveA higher or to a different spot
- Make sure your Opal is using the 192.168.1.x addresses
Can’t get to the MikroTik at 192.168.1.254?
- Make sure you’re connected to the Opal’s WiFi first
- Check that the Opal is actually using 192.168.1.x addresses
- Try using Winbox with the MAC address instead
Nuclear option:
- Hold the reset button on the GroveA for 10 seconds
- Plug directly into it with ethernet
- Start over at 192.168.88.1
📊 Network Flow & Benefits
Internet Request Path:
📱 Your Device → 🔌 GL.iNET Opal WiFi → 🔌 GL.iNET Router → ⚡ PoE Injector → 📻 MikroTik GroveA Bridge → 📡 Club WiFi → 🌐 Internet
Management Access:
📱 Your Device → 🔌 GL.iNET Opal WiFi → 🎛️ MikroTik GroveA (192.168.1.254)
Key Benefits:
- ✅ Single NAT (only at GL.iNET)
- ✅ Direct connection to club network
- ✅ Retained management access
- ✅ Easy password changes
- ✅ Better performance
- ✅ No port forwarding issues
- ✅ Private secure network inside boat
🎉 You’re Done!
Here’s what you ended up with:
- Serious WiFi range – that GroveA grabs signals from way out there
- Clean network setup – no double NAT weirdness
- You stay in control – can always get back into the MikroTik
- Simple wiring – just one cable to the dodger
- Easy updates – password changes don’t require a reset
🔧 Don’t Forget
MikroTik is always at: http://192.168.1.254
Connect to your Opal’s WiFi first, then hit that address to manage the GroveA